WHAT IS AN ANKLE SPRAIN AND WHAT SHOULD I EXPECT?
Ankle sprains are a common injury caused by a stretch or tear of one or more of the ligaments (tough bands connecting bones) that support your ankle. Most ankle injuries are caused by rolling or twisting the ankle. Symptoms include pain, swelling, change in color, and not being able to put weight on the ankle. X-rays may be needed to rule out broken bones or other injuries.
When your ankle is unstable for at least 6 months after initial injury, it is called chronic ankle instability. This can occur when you do not do enough exercise therapy, also known as rehab, after the initial ankle sprain. Not doing rehab can lead to another injury. Patients often say their ankle “gives out.” Pain and swelling can last if you are active too soon or if there is an unrecognized injury.
HOW LONG DOES IT TAKE TO RECOVER FROM AN ANKLE SPRAIN?
Time to recovery depends on how severe the injury is. A mild sprain involves stretching or tiny tears in the ligament; recovery takes 1 to 2 weeks. Moderate sprains involve a partial ligament tear; recovery takes 2 to 4 weeks. You should tape the ankle or wear a brace to protect the joint. In severe sprains, the ligament tears completely; recovery takes 6 to 8 weeks. Supporting the injured ligaments and preventing movement with a semirigid or walking boot may be needed to protect the joint, but your doctor will most likely tell you to start moving again by 10 days to help with faster return to activities. High ankle sprains are more severe injuries. Average recovery time is 8 to 12 weeks.
HOW CAN I BECOME ACTIVE AGAIN?
Wearing outer ankle support, such as a brace or tape, for 12 months while playing high-risk sports can lower your risk of re-injury. Your doctor will give you an exercise program similar to the one presented here to help you heal and return to your normal daily activities. Some patients may need referral to formal physical therapy.
COMMON REHAB PROGRAM EXERCISES
Early Ankle Sprain Exercises
Use pain, swelling, range of motion, and how stable your ankle feels as a guide during the early phase of injury. Some good exercises to try:
Towel stretch (Picture 1): Seated in a chair or on the ground with your leg straight in front of you, loop a towel around the ball of your foot. Pull the towel toward you to stretch your calf. Hold the stretch for 30 seconds, then relax. Repeat 3 to 5 times.
PICTURE 1
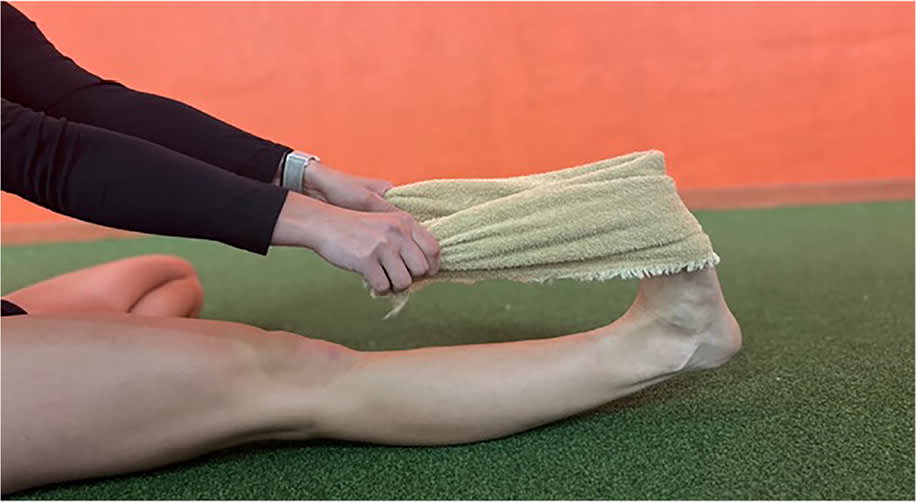
Towel Strech
Ankle pumps: Seated in a chair or on the ground with your leg straight, flex (Picture 2A) and extend (Picture 2B) the ankle. Move your foot up and down. Do two sets of 15.
PICTURE 2
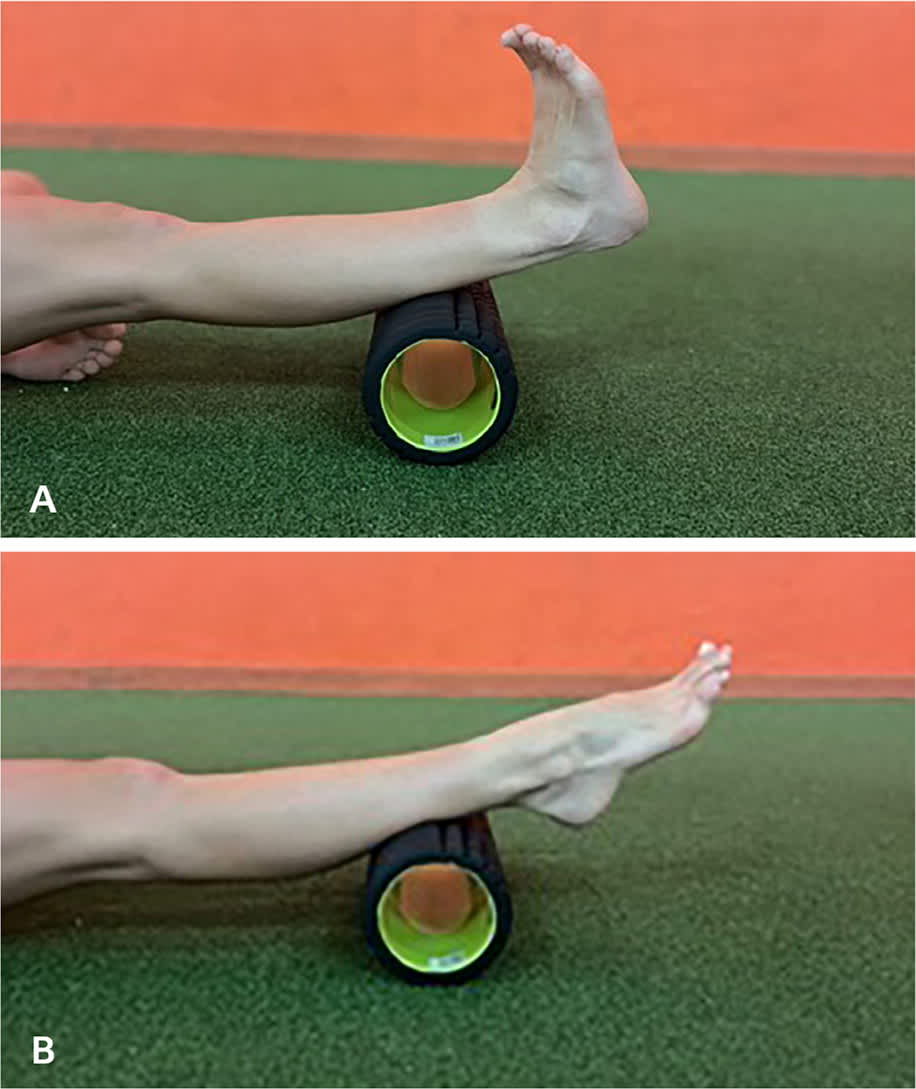
Ankle pump. (A) Flexing motion of the ankle. (B) Extended motion of ankle.
Ankle circles: Seated in a chair or on the ground with your leg straight, move your ankle in a circular motion both clockwise and counterclockwise. Do two sets of 15.
Alphabet writing: Write the alphabet in the air with your big toe while moving only your foot and ankle. This exercise promotes movement in all planes. Start with small movements and then increase as tolerated. Do 2 sets of ABCs.
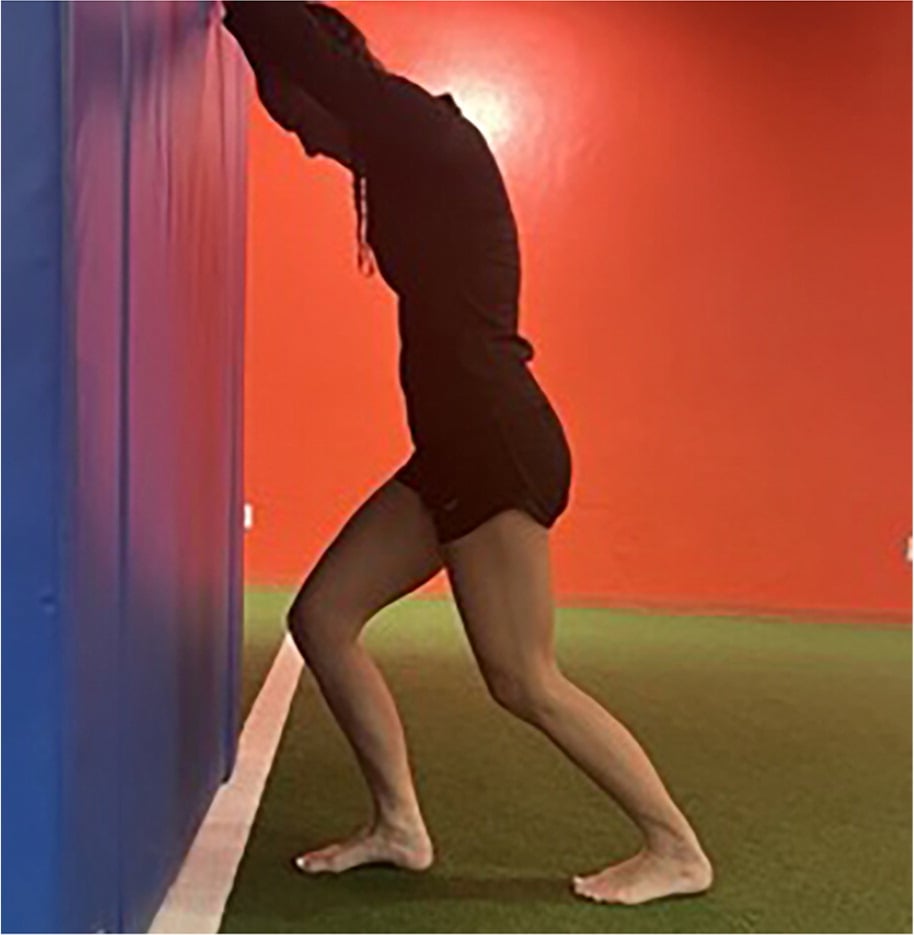
Standing calf stretch (Picture 3): Stand facing a wall; put your injured foot behind the uninjured foot while keeping your injured foot pointing straight toward the wall. Slowly lean forward while keeping the back knee straight and the heel on the ground. Hold stretch for 30 seconds and then relax. Repeat 3 to 5 times.
PICTURE 3
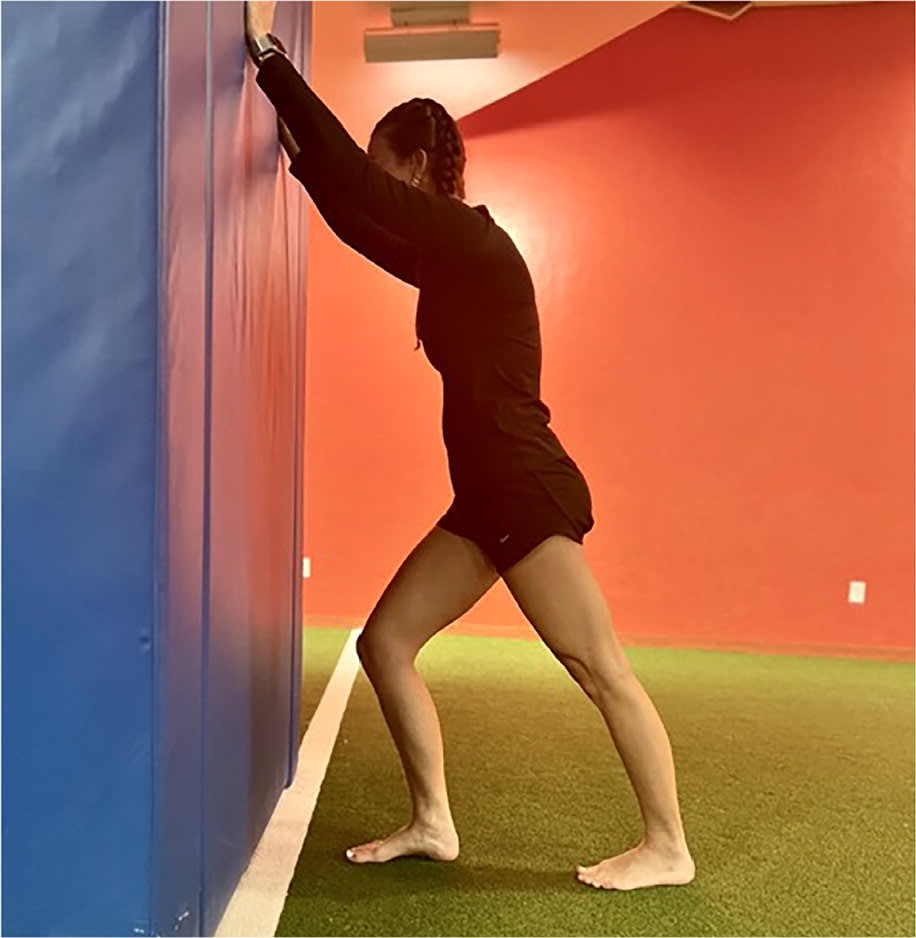
Standing calf stretch.
Bent-knee calf stretch (Picture 4): Stand facing a wall; place your injured foot behind the uninjured foot, keeping your injured foot pointing straight toward the wall. Slowly lean forward while keeping the back knee slightly bent and the heel on the ground. Hold the stretch for 30 seconds and then relax. Repeat 3 to 5 times.
PICTURE 4
Bent-knee calf stretch
Achilles (say: uh-KILL-eez) stretch (Picture 5): Stand on the ball of one foot on a stair or raised platform. Lower your heel down until you feel a stretch in the arch of your foot and calf. Hold this position for 30 seconds and then relax. Repeat 3 to 5 times.
PICTURE 5
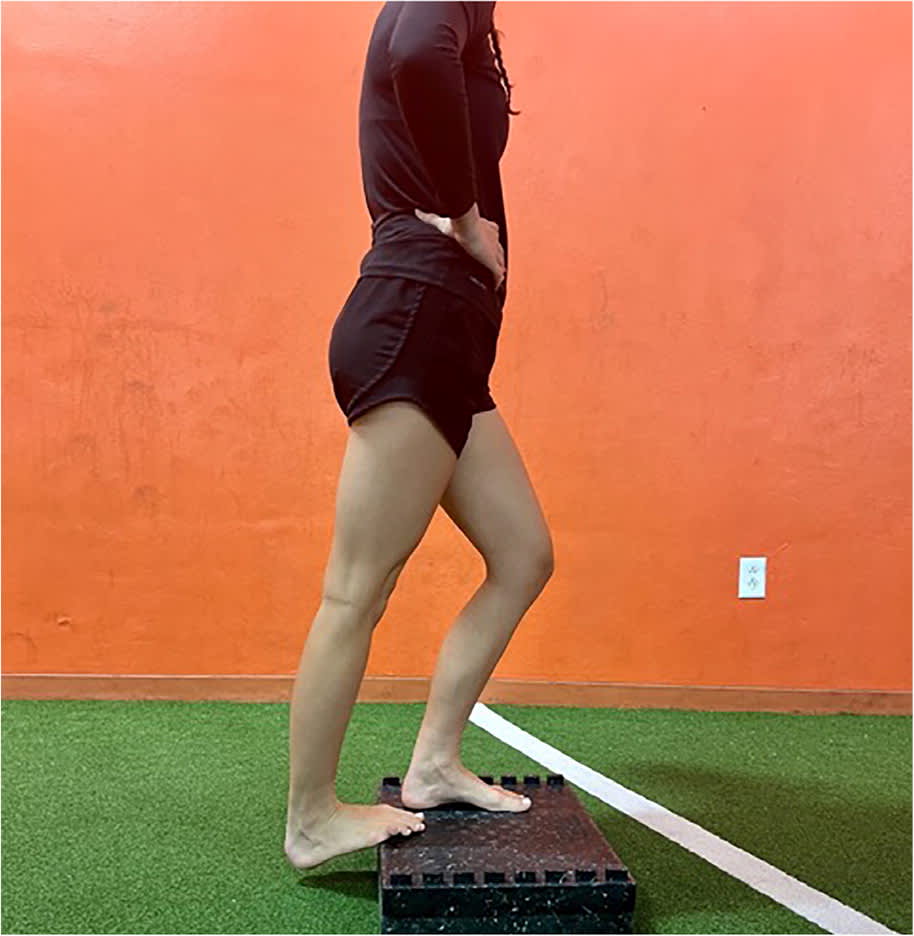
Achilles stretch.
Basic Strength Exercises
After the ankle range of motion has significantly improved, try these strength exercises while seated with the injured leg straight.
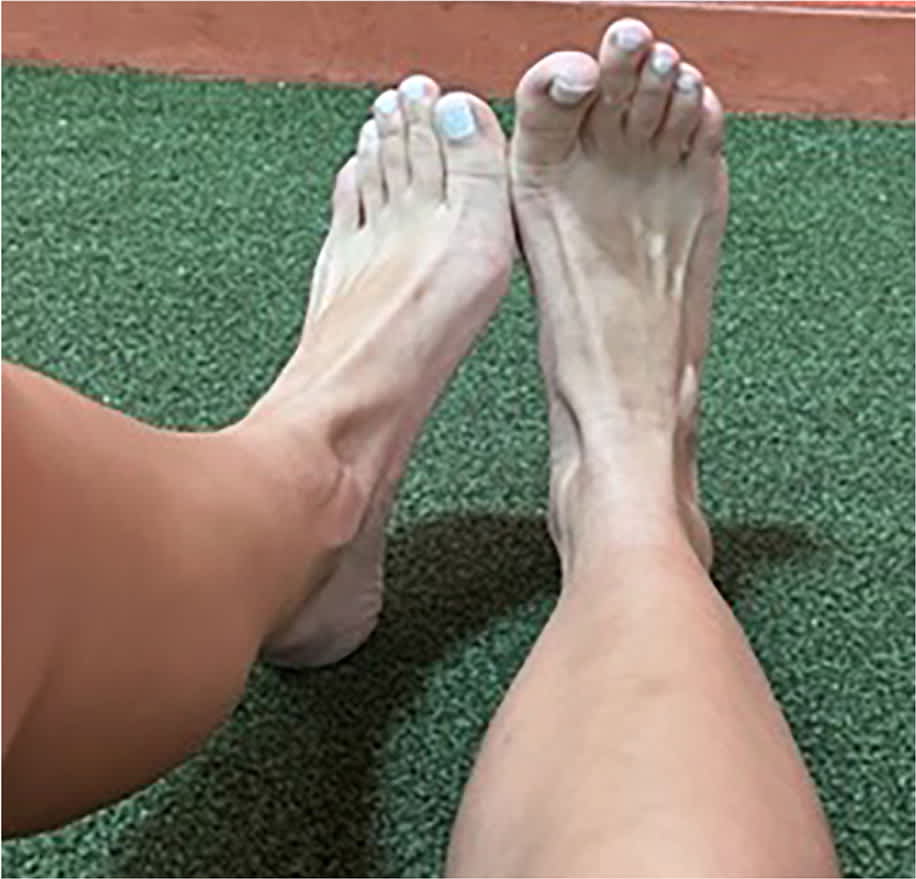
Dorsiflexion (Picture 6): Pull your toes toward you while using the uninjured foot to block the movement. Hold tension for 5 to 10 seconds. Repeat 3 to 5 times.
PICTURE 6
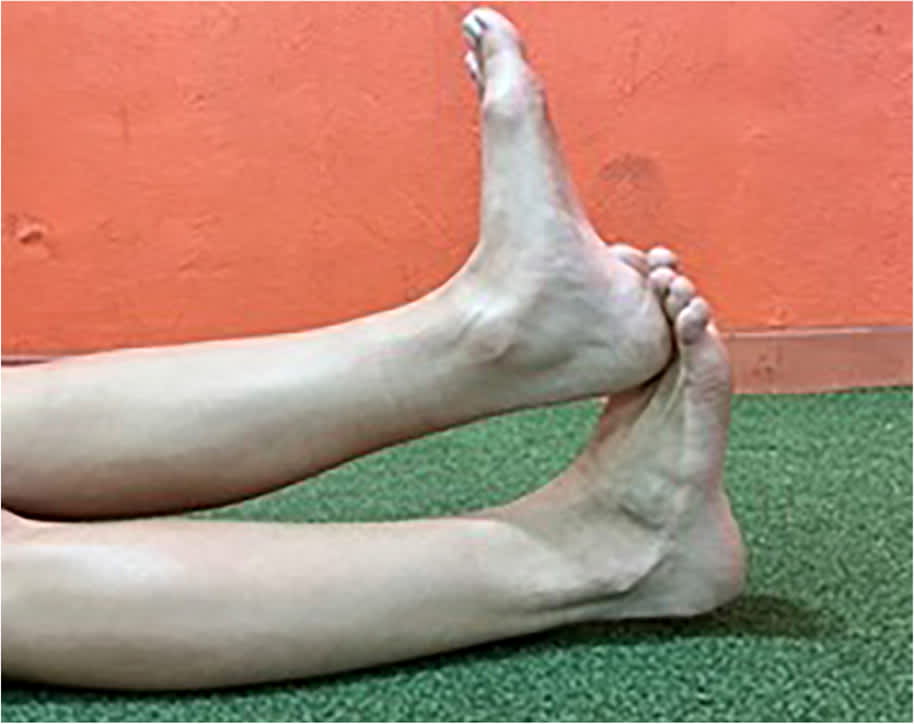
Dorsiflexion exercise.
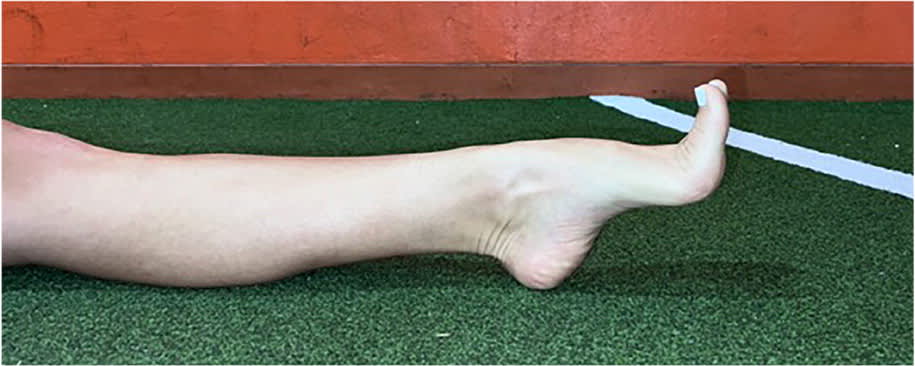
Plantarflexion (Picture 7): Place your foot against a solid object (a wall), push down with your toes like pushing on a gas pedal. Hold tension for 5 to 10 seconds. Repeat 3 to 5 times.
PICTURE 7
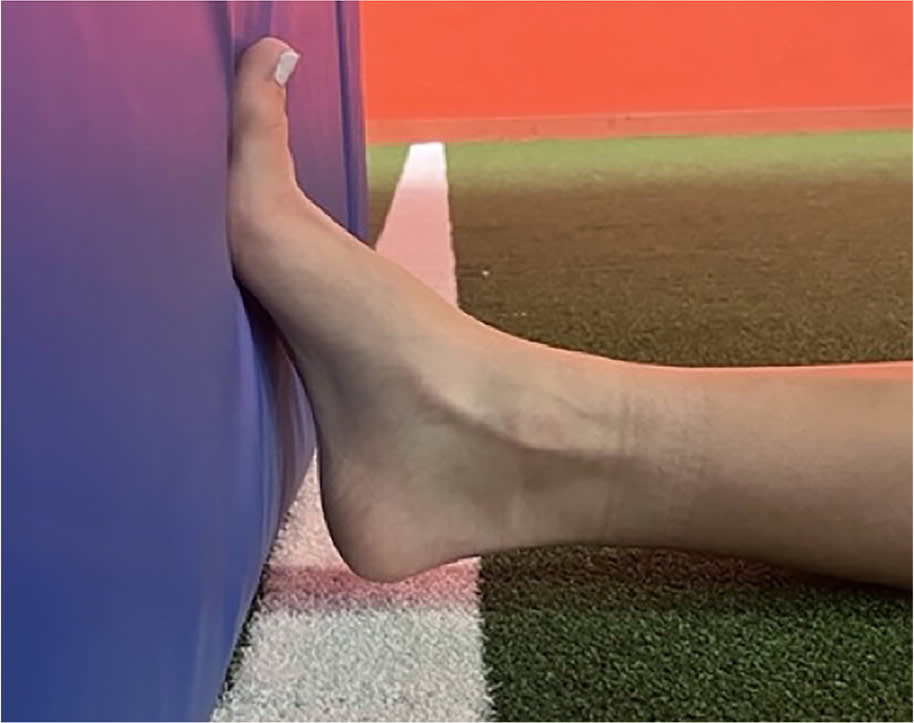
Plantarflexion exercise.
Eversion (Picture 8): Push against a solid object with the outside of your foot. Hold tension for 5 to 10 seconds. Repeat 3 to 5 times.
PICTURE 8

Eversion exercise.
Inversion (Picture 9): Push against a solid object with the inside of your foot. Hold tension for 5 to 10 seconds. Repeat 3 to 5 times.
PICTURE 9
Inversion Exercise.
Exercise Bands
You can start using exercise bands early in the healing process because they are safe for ligaments.
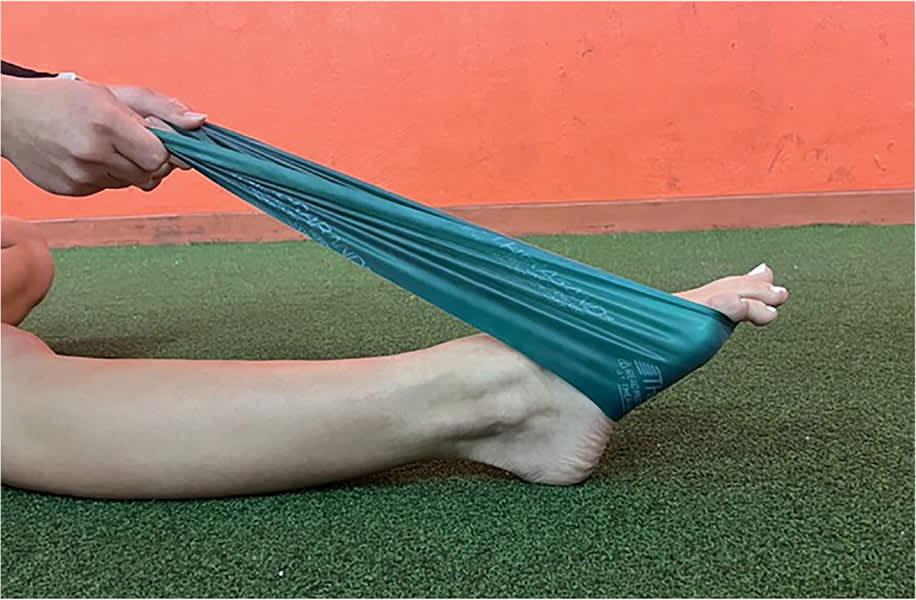
Resisted dorsiflexion (Picture 10): Anchor the exercise band around the leg of a chair or table in front of you. Sit with your leg straight and then wrap the band around your foot. Pull your toes toward your body and then return slowly to the resting position. Do 3 sets of 10.
PICTURE 10
Resisted dorsiflexion exercise.
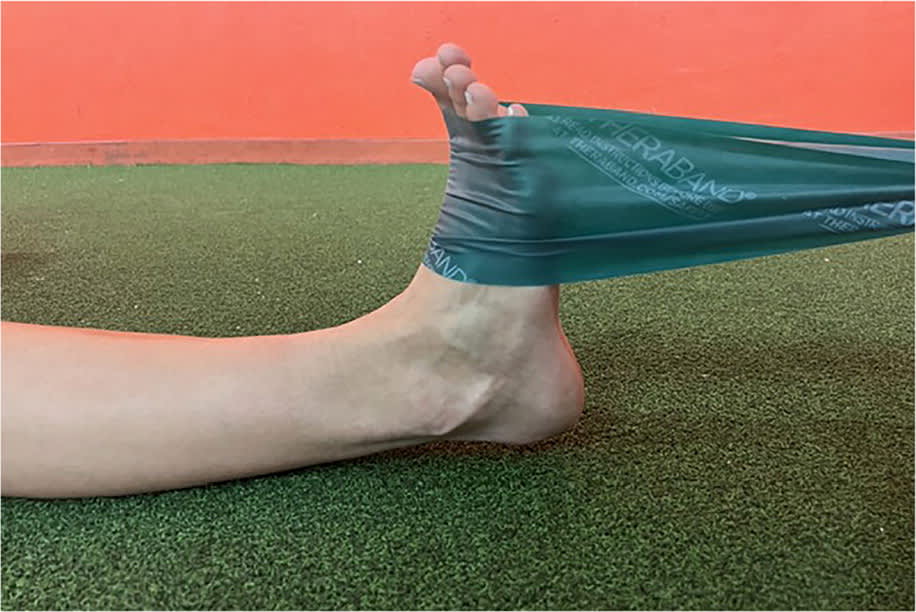
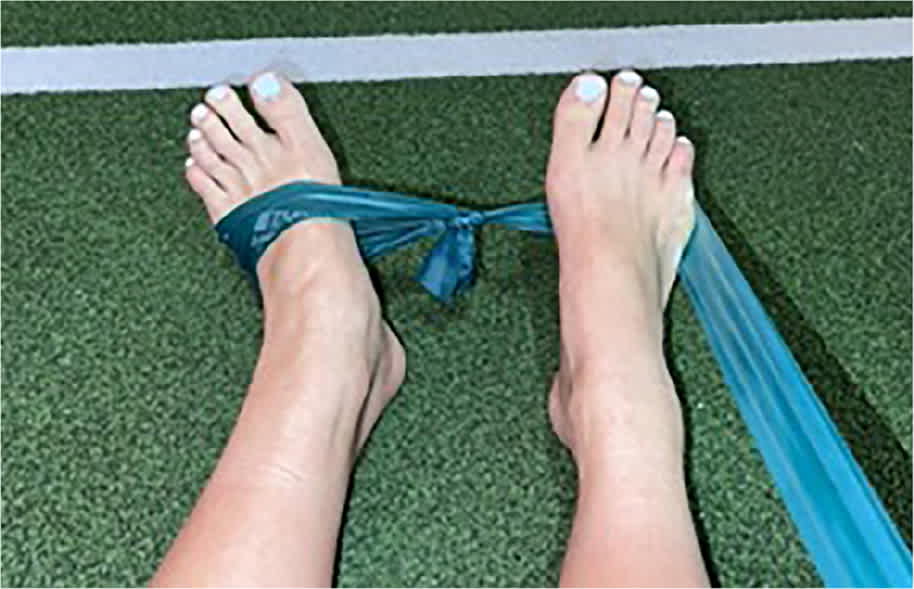
Resisted plantarflexion (Picture 11): Sit with your leg straight and wrap the band around the ball of your foot. Push your foot down and point your toes, stretching the band. Return slowly to the resting position. Do 3 sets of 10.
PICTURE 11
Resisted plantarflexion exercise.
Resisted inversion (Picture 12): Sit with your legs straight and cross your uninjured leg over the top of your injured ankle. Wrap the band around the ball of your injured foot and then loop the band around your uninjured foot to anchor the band. Hold the band in your hand and then turn your foot inward and upward while stretching the band. Slowly return to the resting position. Do 3 sets of 10.
PICTURE 12
Resisted inversion exercise.
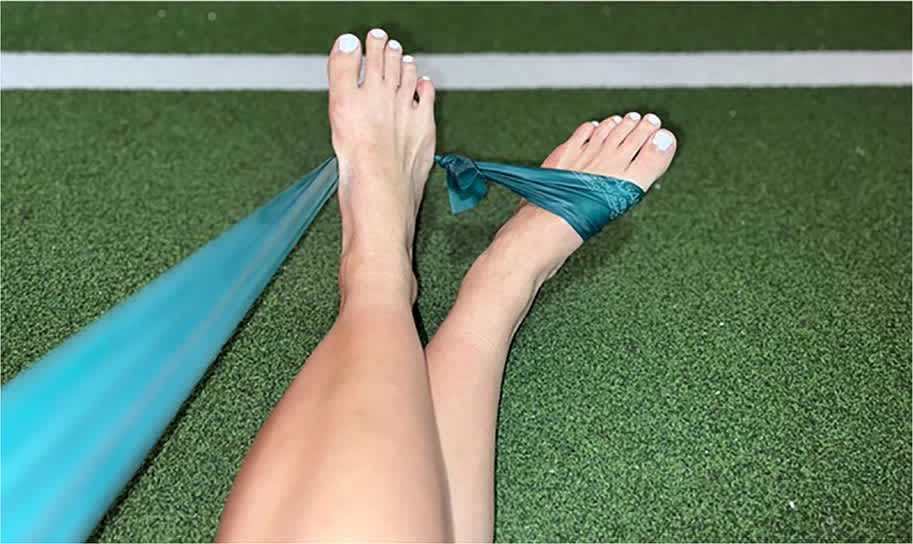
Resisted eversion (Picture 13): Sit with your legs together, straight out, and wrap the band around the ball of your injured foot; loop around your uninjured foot to anchor the band. Hold the band in your hand and then turn your foot outward and upward while stretching the band. Slowly return to the resting position. Do 3 sets of 10.
PICTURE 13
Resisted eversion exercise.
Toe Raises
Seated toe raises (Picture 14): Sit with your feet flat on the ground; lift your toes off the ground while leaving your heel on the ground and hold for 3 to 5 seconds. Alternate feet one at a time. Do 3 sets of 10.
PICTURE 14
Seated toe raise.
Standing toe raises (Picture 15): Stand on your injured foot while supporting your body weight with your hands on a chair or table. Lift your toes off the ground, lean on your heel, hold for 3 to 5 seconds, and slowly return to resting position. Do 3 sets of 10.
PICTURE 15
Standing toe raise.
Heel Raises
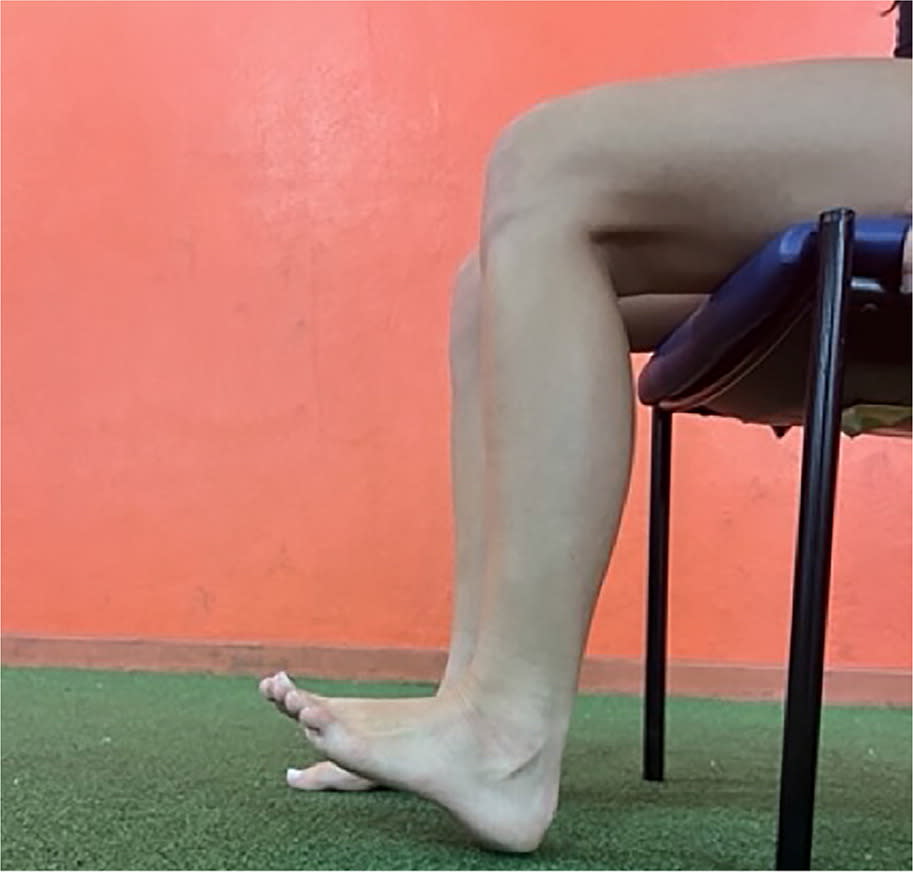
Seated heel raises (Picture 16): Sit with your feet flat on the ground; lift your heel while leaving your toes on the ground. Hold for 3 to 5 seconds and return to the resting position. Do 3 sets of 10.
PICTURE 16

Seated heel raise.
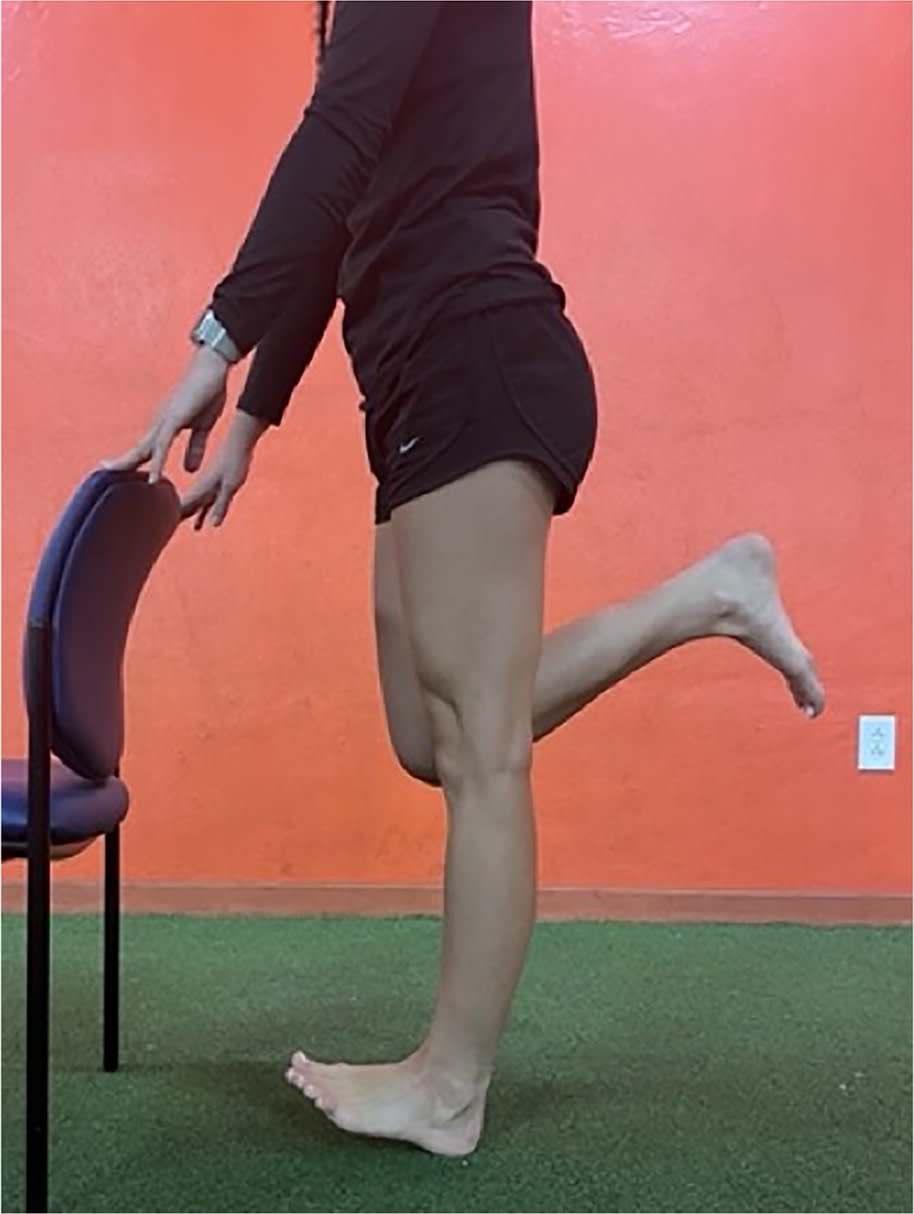
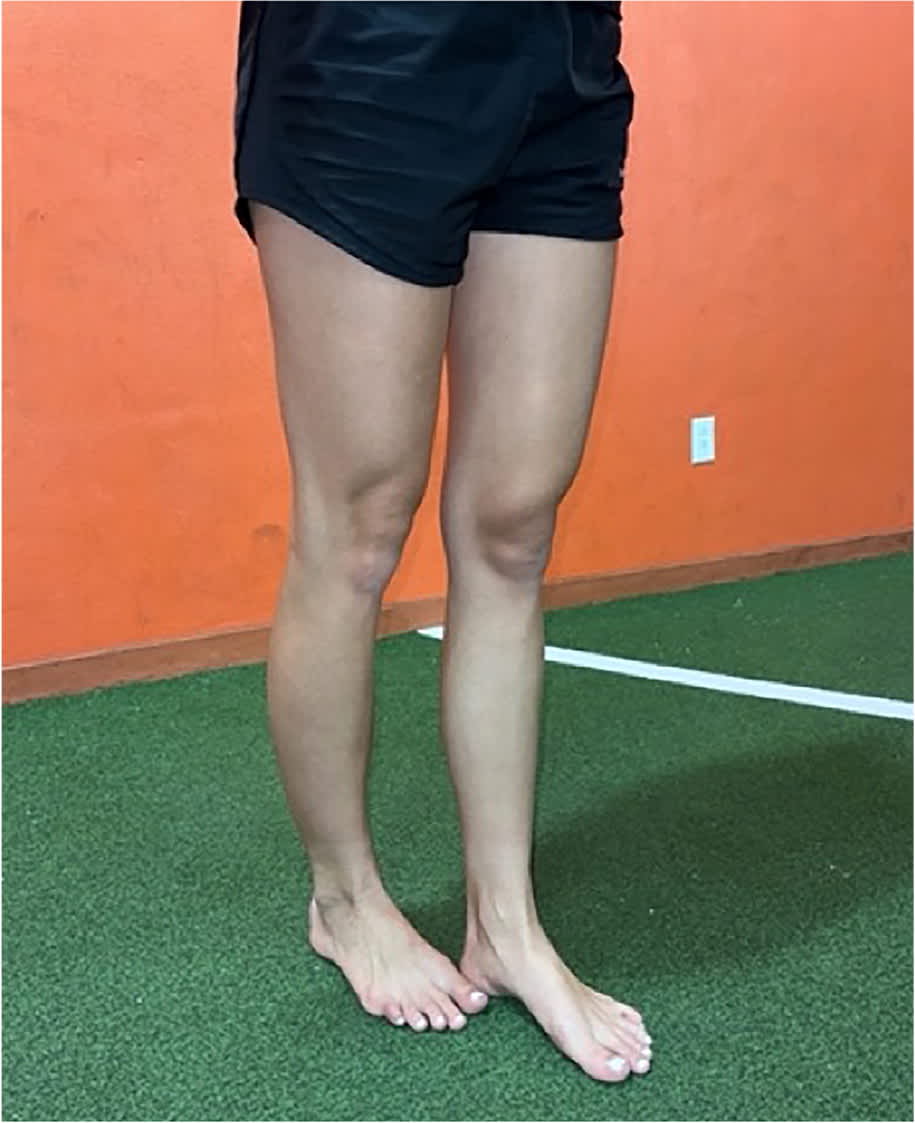
Standing heel raises (Picture 17): Start with bilateral (standing on both feet) heel raises and progress to single-leg heel raises. Stand on the injured leg while holding onto a chair or table for support. Lift the heel off the ground, balance on your toes, hold for 3 to 5 seconds, and slowly return to the resting position. Do 3 sets of 10.
PICTURE 17
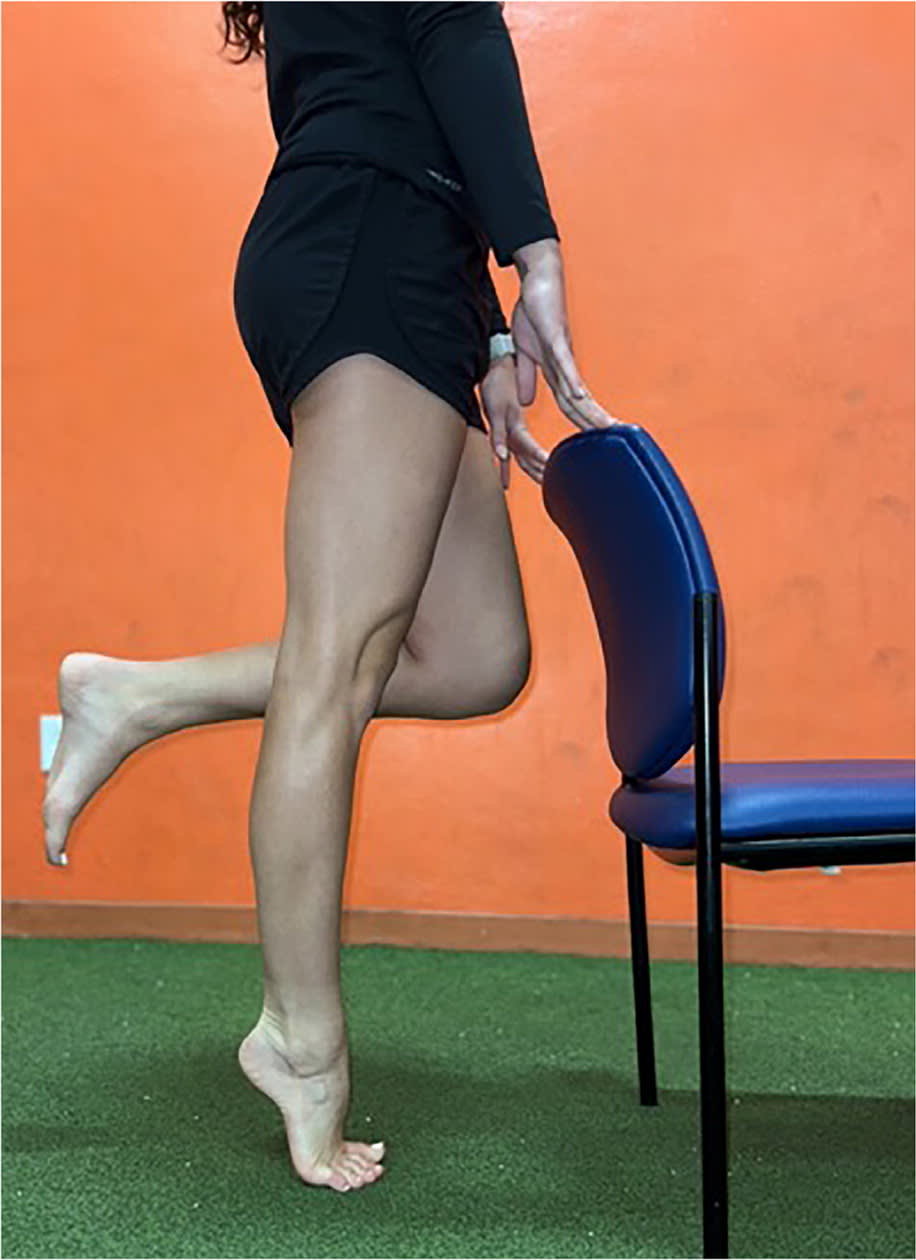
Standing heel raise.
Balance and Posture
Adding these exercises improves your balance and posture, lowering your risk of re-injury.
Toe extension with ankle plantarflexion (Picture 18): Sit with your leg straight and point your toes down. Keep your ankle in this position and lift your toes upward toward your shins. Hold for 2 to 3 seconds and return to the resting position. Do 3 sets of 10.
PICTURE 18
Toe extension with ankle plantarflexion.
Toe flexion with ankle dorsiflexion (Picture 19): Sit with your leg straight and bring your foot and toes toward your shin. Keep your ankle flexed and curl your toes toward the sole of your foot. Hold for 2 to 3 seconds and return to the resting position. Do 3 sets of 10.
PICTURE 19

Toe flexion with ankle dorsiflexion.
Semi-tandem stance (Picture 20): Stand upright with one foot in front of the other. The toes of the back foot should be touching the inside of the heel of the front foot. Hold this position by engaging your core (stomach and buttock muscles), making sure your weight is evenly balanced between both feet. Hold for 30 to 60 seconds. Repeat 2 to 3 times.
PICTURE 20
Semi-tandem stance
Full-tandem stance (Picture 21): Stand and position your feet heel to toe (like walking a tightrope). Maintain this position by engaging your core, keeping your weight evenly balanced between both feet. Hold for 30 to 60 seconds. Alternate feet and repeat 2 to 3 times.
PICTURE 21
Full-tandem stance.
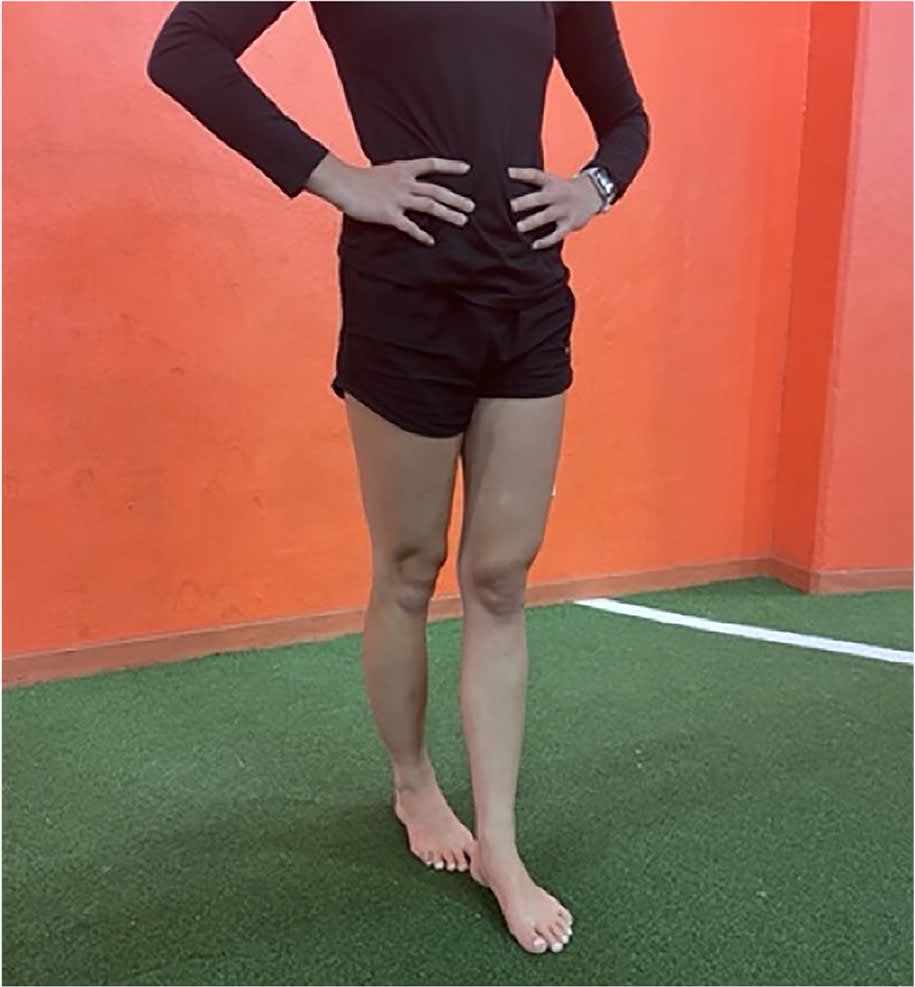
Single-leg stance on firm surface (Picture 22) (when you can fully bear weight with little pain)
PICTURE 22
Single-leg stance on firm surface.
- Eyes open: Stand on your injured leg and balance on a firm surface, keep your eyes open, and hold for 30 seconds. Do 3 times.
- Eyes closed: Stand on your injured leg and balance on a firm surface, close your eyes, and hold for 30 seconds. Do 3 times.
Single-leg stance on uneven surface (Picture 23)
PICTURE 23
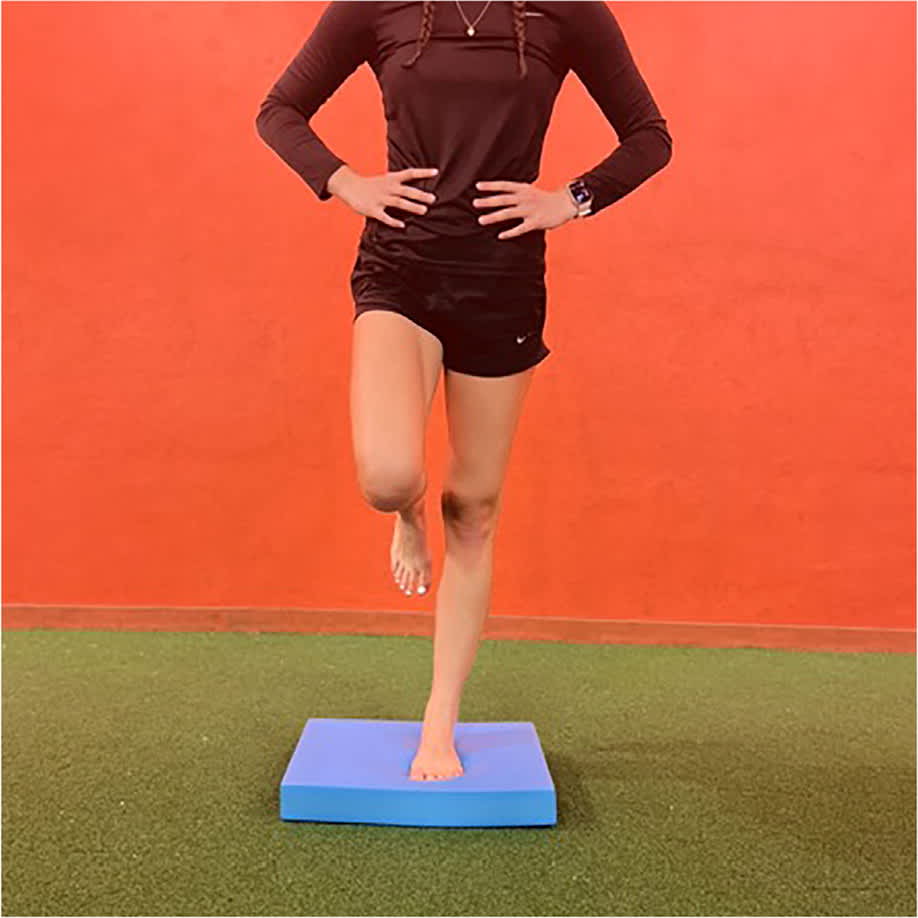
Single-leg stance on uneven surface.
- Eyes open: Stand on your injured leg and balance on an uneven surface (eg, pillow, folded towel, blanket), keep your eyes open, and hold for 30 seconds. Do 3 times.
- Eyesclosed: Stand on your injured leg and balance on an uneven surface (eg, pillow, folded towel, blanket), close your eyes, and hold for 30 seconds. Do 3 t imes.
Clock touches: Stand and balance on your injured leg, lift your other foot and reach to tap in front of you at 12 o'clock (Picture 24A), to the same side at 3 or 9 o'clock (Picture 24B), and behind you at 6 o'clock (Picture 24C). Repeat 3 to 5 times.
PICTURE 24
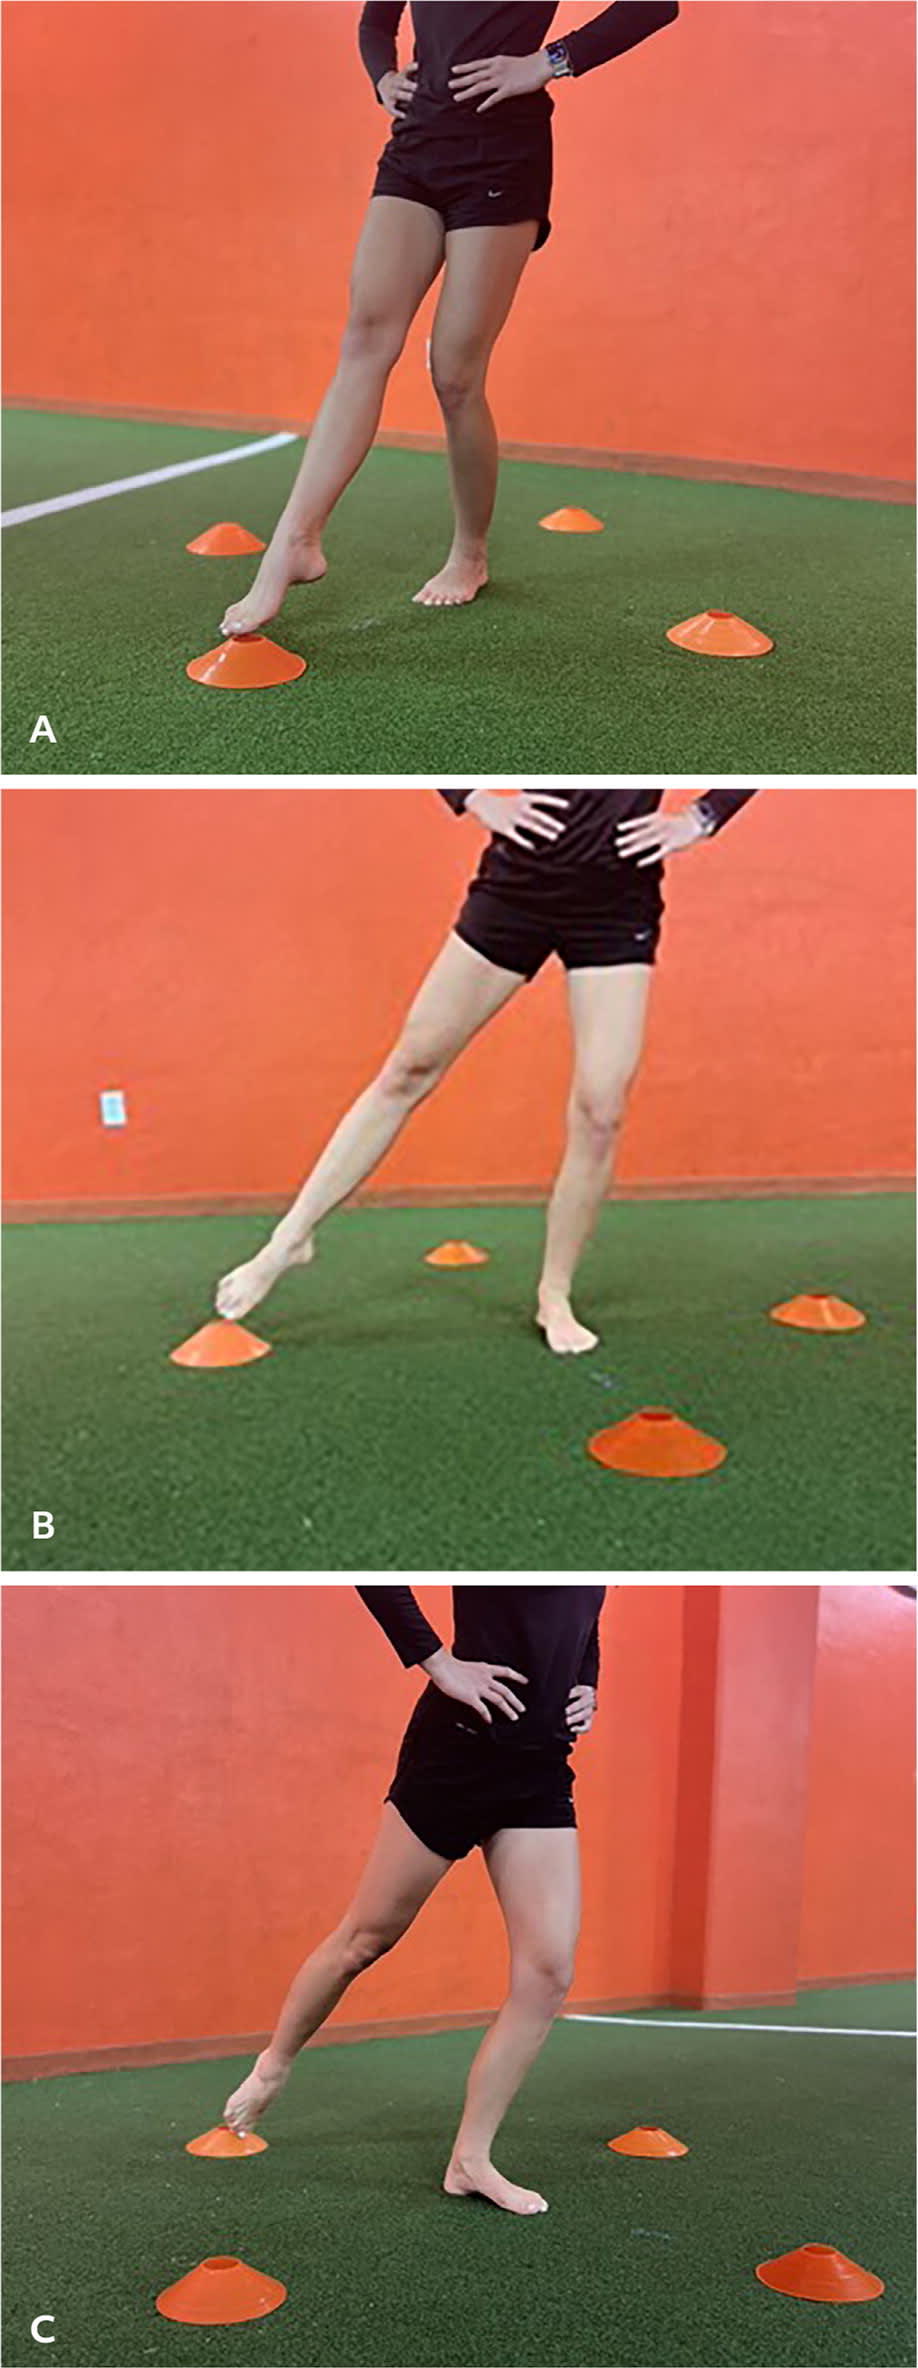
Clock touches. (A) Tap in front at 12 o'clock. (B) Tap to the same side at 3 or 9 o'clock. (C) Tap behind at 6 o'clock.
Core Posture Strengthening
Lateral leg raises (Picture 25): Lie on your side and keep your top leg straight, with your top leg slightly farther back than your leg on the ground. Lift your top leg toward the ceiling and hold for 1 second before slowly lowering it back down. Do 2 sets of 10 to 20. You can perform with exercise bands to make it more difficult.
PICTURE 25
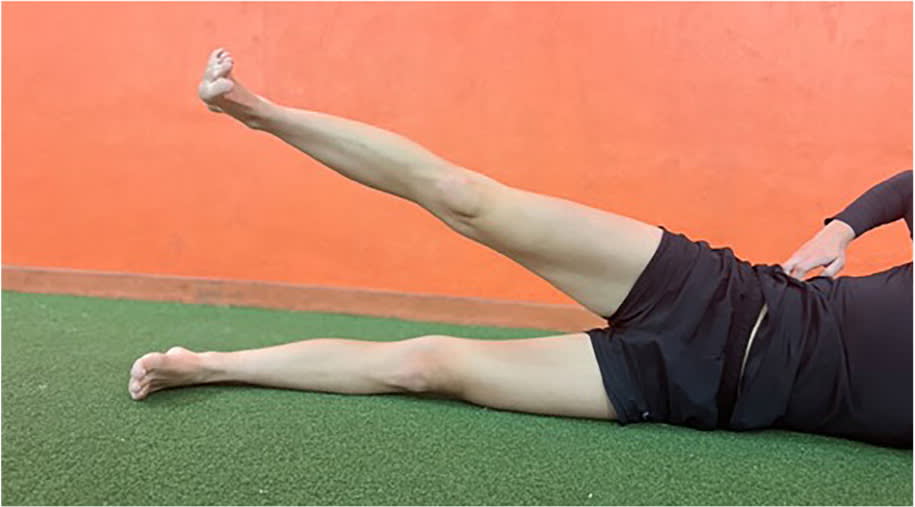
Lateral leg raise.
Clam shells (Picture 26): Lie on your side with your knees bent and feet together. Lift your top knee while keeping your feet together and hold for 1 second before slowly lowering back down. While doing the exercise, keep your hips still and do not let them roll forward or backward. Do 2 sets of 10 to 20.
PICTURE 26
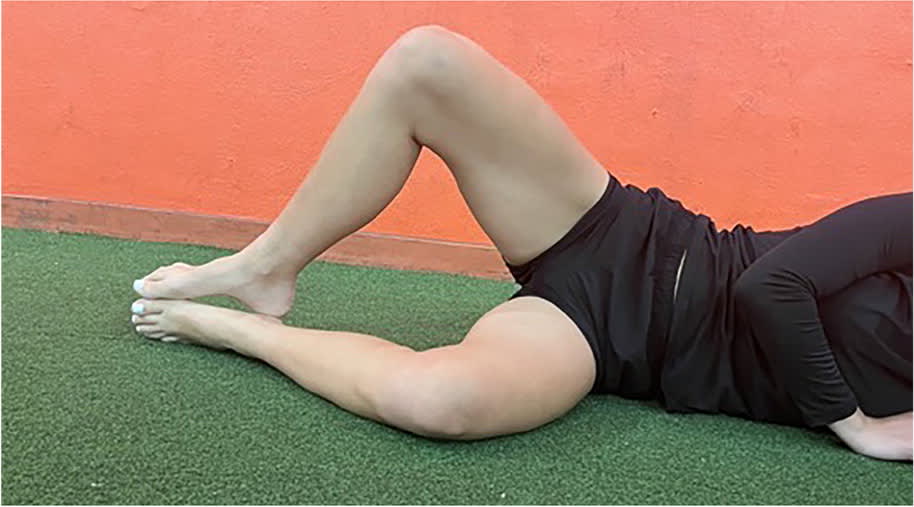
Clam shell
Bridges (Picture 27): Lie on your back with knees bent and feet on the floor, then lift your hips toward the ceiling, holding for 1 to 2 seconds before lowering your hips back down. Do 2 sets of 10 to 20.
PICTURE 27
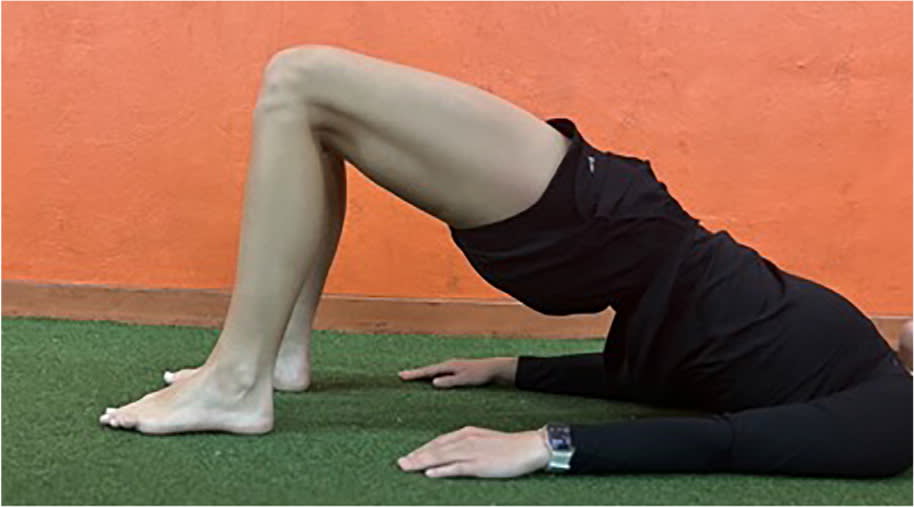
Bridge.
Bird dog (Picture 28): Start on your hands and knees in a tabletop position. Place your hands directly under your shoulders and your knees directly under your hips. Extend one arm forward while reaching your opposite leg backward, keeping your spine in a neutral position. Hold for 1 to 2 seconds before returning to the starting position and changing sides. Do 10 on each side.
PICTURE 28
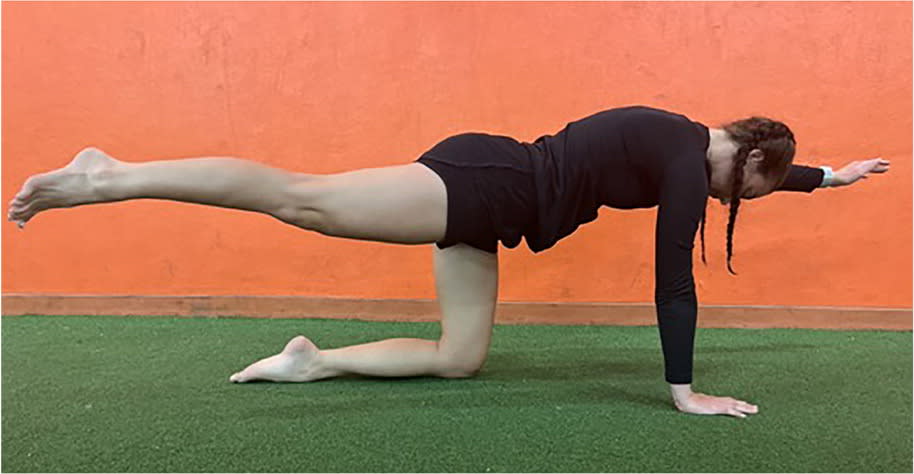
Bird dog.
Planks (Picture 29): While lying face down on the ground, place your forearms on the ground directly under your shoulders, palms down. Straighten your legs, with your toes tucked under. Lift your body off the ground, forming a straight line from your head to your heels. Engage your core muscles (ie, tighten your stomach, buttocks) to hold this position; make sure that your hips do not drop down or raise up. Try to hold for 20 to 60 seconds as you get stronger. Repeat 3 to 5 times.
PICTURE 29
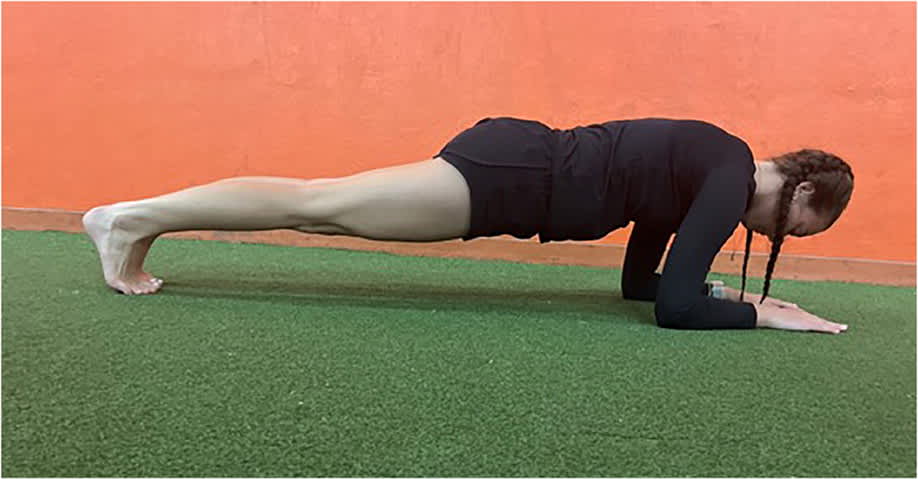
Plank.
Lunges (Picture 30): Begin standing upright with your hands resting on your hips and your feet shoulder-width apart. Step forward and lower your body toward the ground into a lunge position, making sure you keep your trunk upright. Return to the starting position. Repeat on the other leg. Do 3 sets of 10.
PICTURE 30
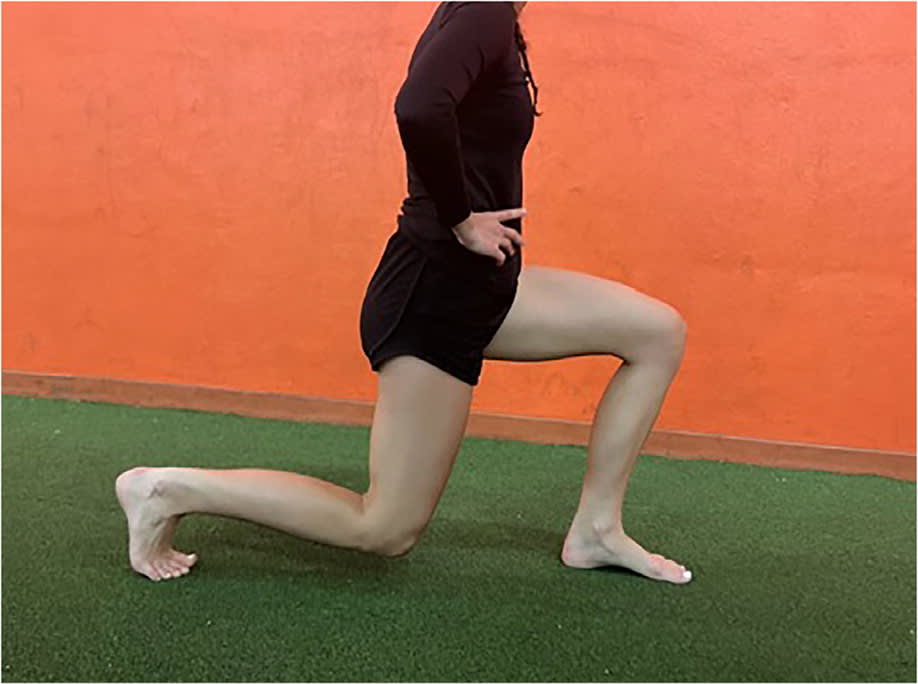
Lunge.
Return-to-Play Drills
Lateral (side to side) shuffles: Stand with feet shoulder-width apart and knees slightly bent. While in a low stance, take a quick step to the side with one foot, followed by the other foot. Start with shuffling 10 to 15 feet at a moderate pace. You can increase speed and distance as you become more confident. Do 3 sets of 10 to 15 shuffles in each direction.
- Perform lateral shuffles with sport-specific drills if desired (eg, dribbling, catching a ball).
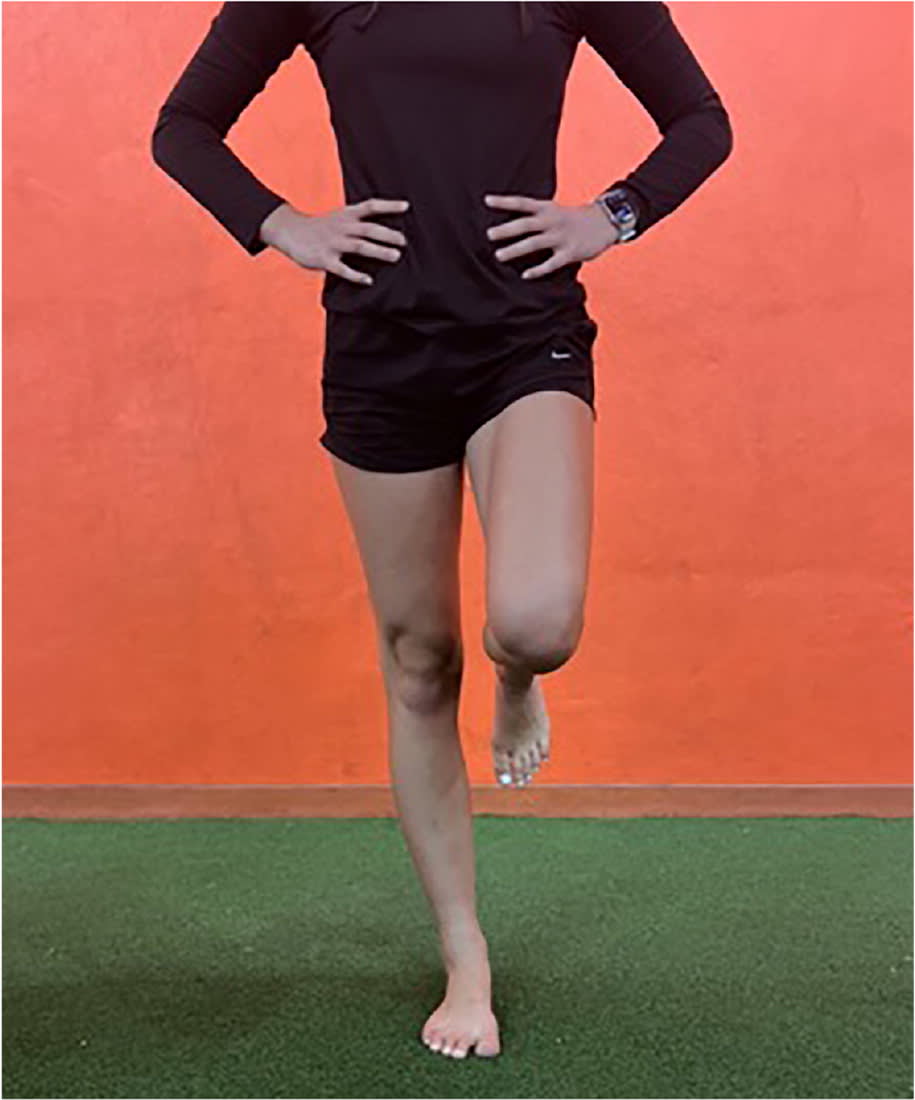
Single-leg hops: Stand on your injured leg with the opposite leg lifted off the ground. Hop forward, landing on the same leg, and maintain balance and control. Gradually increase the distance of hops as tolerated. Do 3 sets of 10 to 15 hops.
- Try hops in different directions (side to side, backward, forward) to mimic sport-specific movements if desired.
Figure 8 running: Place two cones or markers 10 to 15 feet apart. Start at one cone, run diagonally toward the second cone, and make a tight turn around the cone. Run diagonally back to the first cone, make another tight turn, and run back to the second cone, forming a figure 8 pattern. Start at a moderate pace to ensure proper form and balance, then gradually increase your speed as tolerated. Do 3 sets of 5 to 10 figure 8 turns.
HOW DO I TREAT MY ANKLE SPRAIN? WHICH REHAB EXERCISES WILL HELP AND WHEN SHOULD I DO THEM?
Acute Phase: up to 3 Days After Injury, Depends on Injury
Apply ice for 20 minutes every 2 to 3 hours. Heat should not be used in the early phases of injury. Drugs like acetaminophen (brand name: Tylenol) can be used to treat pain. Other anti-inflammatory drugs such as naproxen and ibuprofen may slow the normal healing process.
Wear a compression wrap and elevate the injured ankle above heart level to reduce swelling. You can also gently flex and extend (point your foot up and down) the affected foot as often as you can. Working on early range of motion promotes healing. Use your pain as a guide.
Wear a stirrup or lace-up brace or tape your ankle to treat mild to moderate ankle sprains. These braces can help protect the injured structures and allow early weight-bearing. For severe sprains, wear a rigid stirrup brace or walking boot for up to 10 days to protect the ankle, minimize further damage, and promote optimal healing.
Use crutches for pain relief and to protect the joint for a short time, if needed. As pain improves, use crutches to help bear weight. Early weight-bearing with external support helps restore function and shortens recovery time while protecting the ankle joint. Call your doctor if pain and swelling do not improve or if you are not able to flex and extend the foot.
Subacute Phase: 3 to 7 Days After Injury
You will reach this phase after pain, swelling, and discoloration get better. Slowly increase weight-bearing as tolerated and wean yourself off using crutches. You should continue using external support with weight-bearing for 4 weeks.
Active range-of-motion and stretching exercises are important. Use your pain as a guide. Range-of-motion exercises and stretches help you regain full range of motion, reduce stiffness, and promote blood flow for healing. These exercises include ankle circles, alphabet writing, and towel stretches (Picture 1) that enhance mobility.
After you have shown strong improvement in your range of motion, start exercises described in the rehab section. When you can bear weight, start balance exercises.
Do not progress to the next stage of rehab if you do not have enough range of motion, especially if you cannot flex your foot up or down without pain. You also should not move to the next stage until you have enough strength in the muscles supporting your ankle. Exercise-band training can help with this.
Early Rehab Phase: 1 to 2 Weeks After Injury
You should be able to bear full weight with minimal to no pain while walking. Continue doing the ankle and calf stretches (Pictures 1–4). Add the Achilles stretch (Picture 5) after you feel more stable and have less pain holding up your body weight.
Keep using exercise bands to strengthen your foot and ankle. Progress to standing toe and heel raises (Pictures 15 and 17). Next, add core exercises, such as squats, to improve control of your posture and help to reduce re-injury. Working on your balance is important. Try advanced exercises such as full-tandem stance (Picture 21) and single-leg stance on an uneven surface (Picture 23).
Do not move to the next stage of rehab if you have trouble with balance exercises or feel unstable, weak, or like your ankle is “giving out.” Also, do not move on if you have recurrent swelling or atypical pain.
Advanced Rehab Phase: 2 to 6 Weeks After Injury
Hop, jump rope, move side to side, and try low-intensity sport-specific drills. Continue current exercises to improve balance. Being able to control your posture is critical to avoid re-injury. You can also try more sport-specific activities based on how confident and stable you feel to complete these more complex movements.